These instructions are for the Skylight Calendar product. If you purchased a Skylight Digital Photo Frame, read more about the Skylight Frame HERE.
Sync your subscribed calendars with Skylight Calendar through the mobile app by following the instructions below:
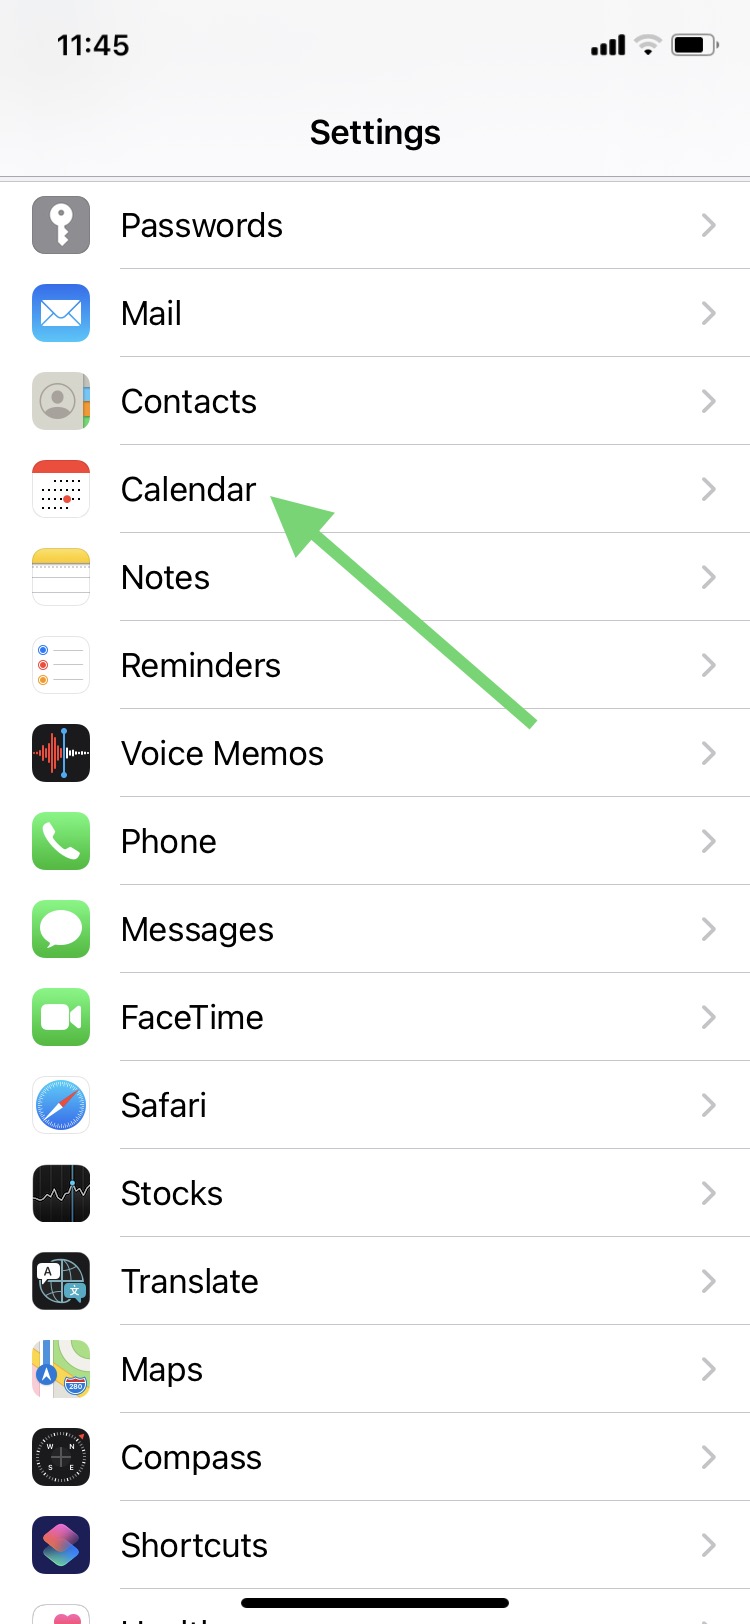
- Open the Settings app on your iPhone, and tap on Calendar:
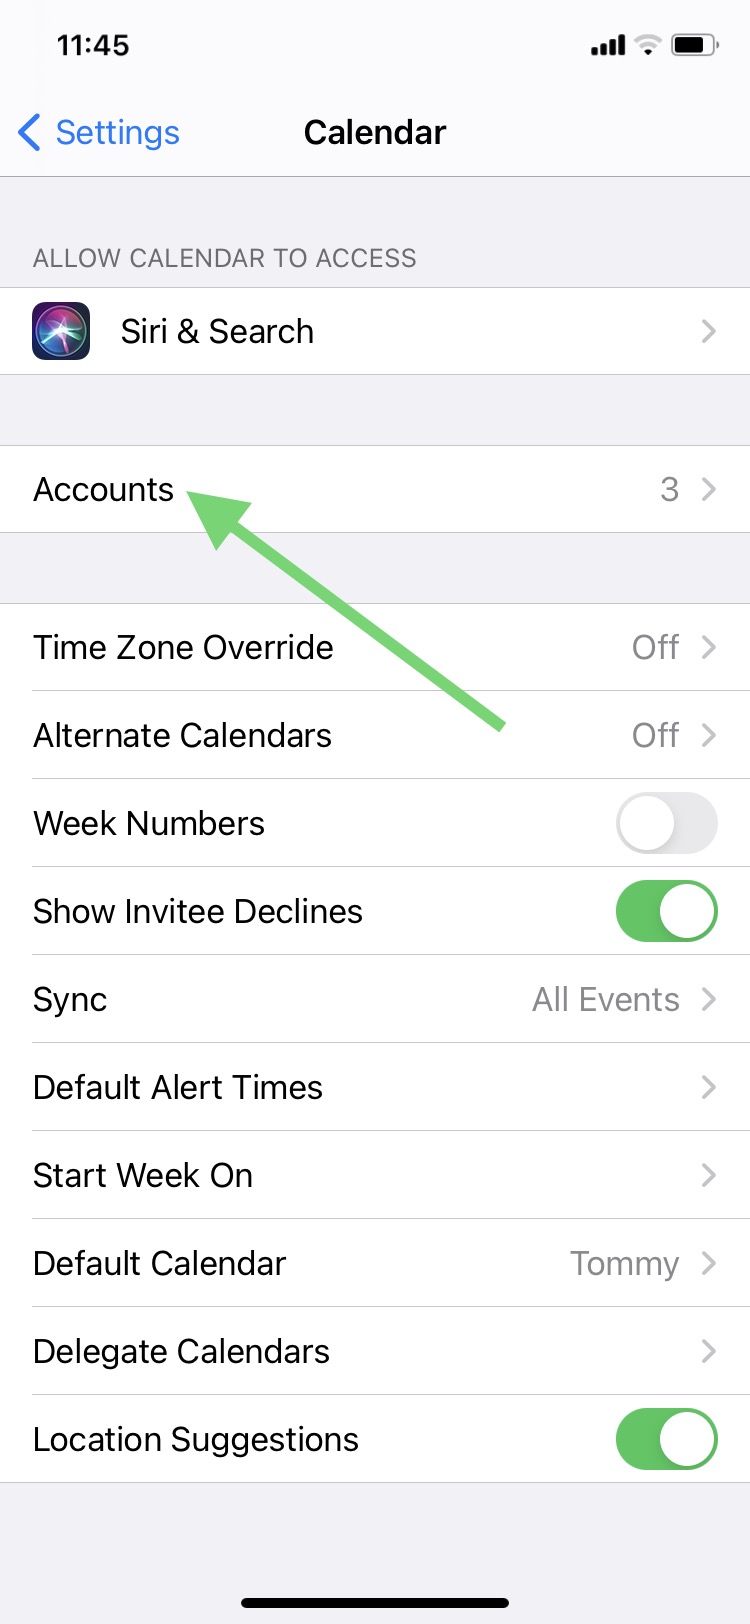
- Within Calendar, tap on Accounts:
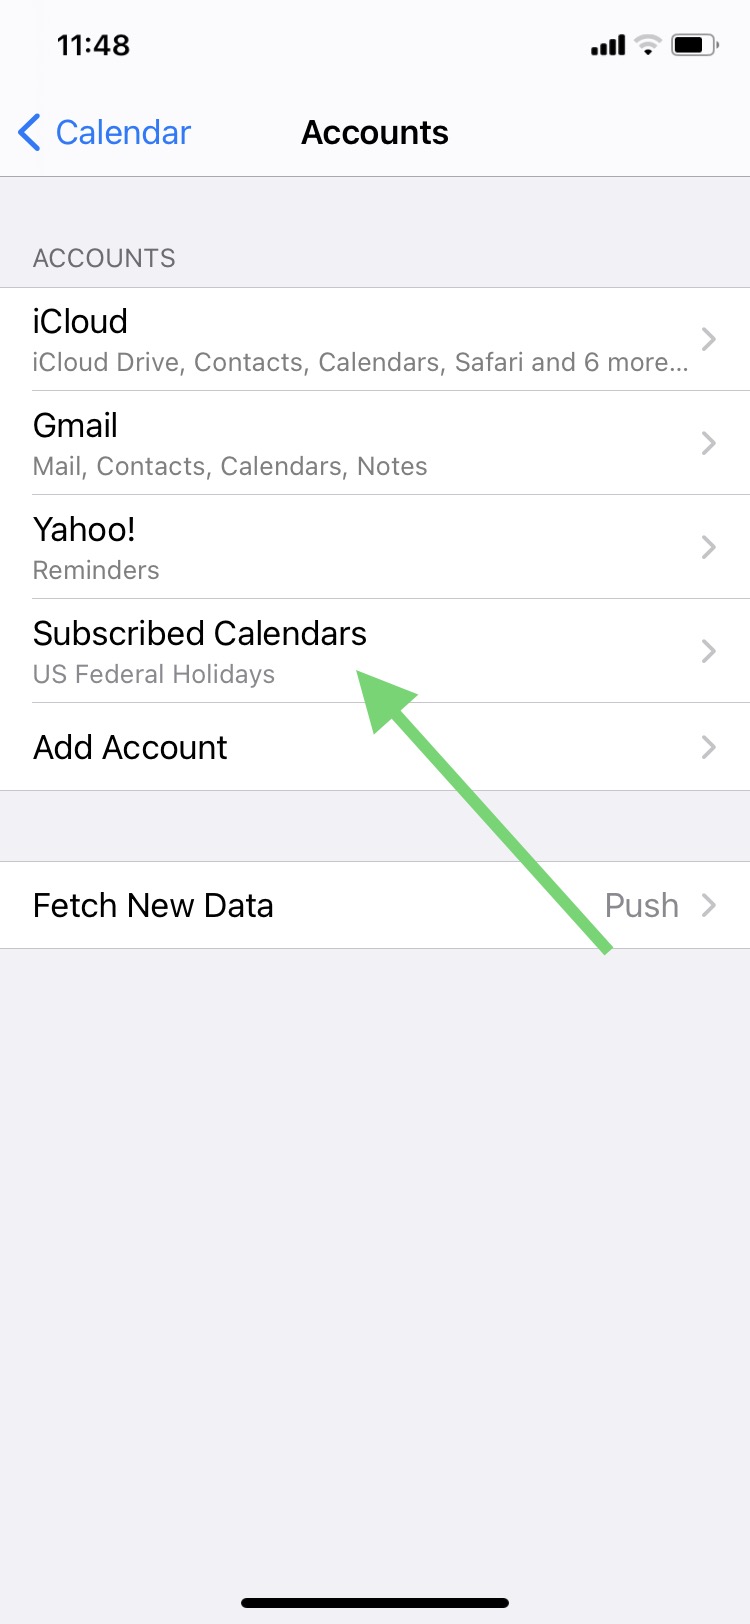
- Select Subscribed Calendars from the list of options under Accounts:
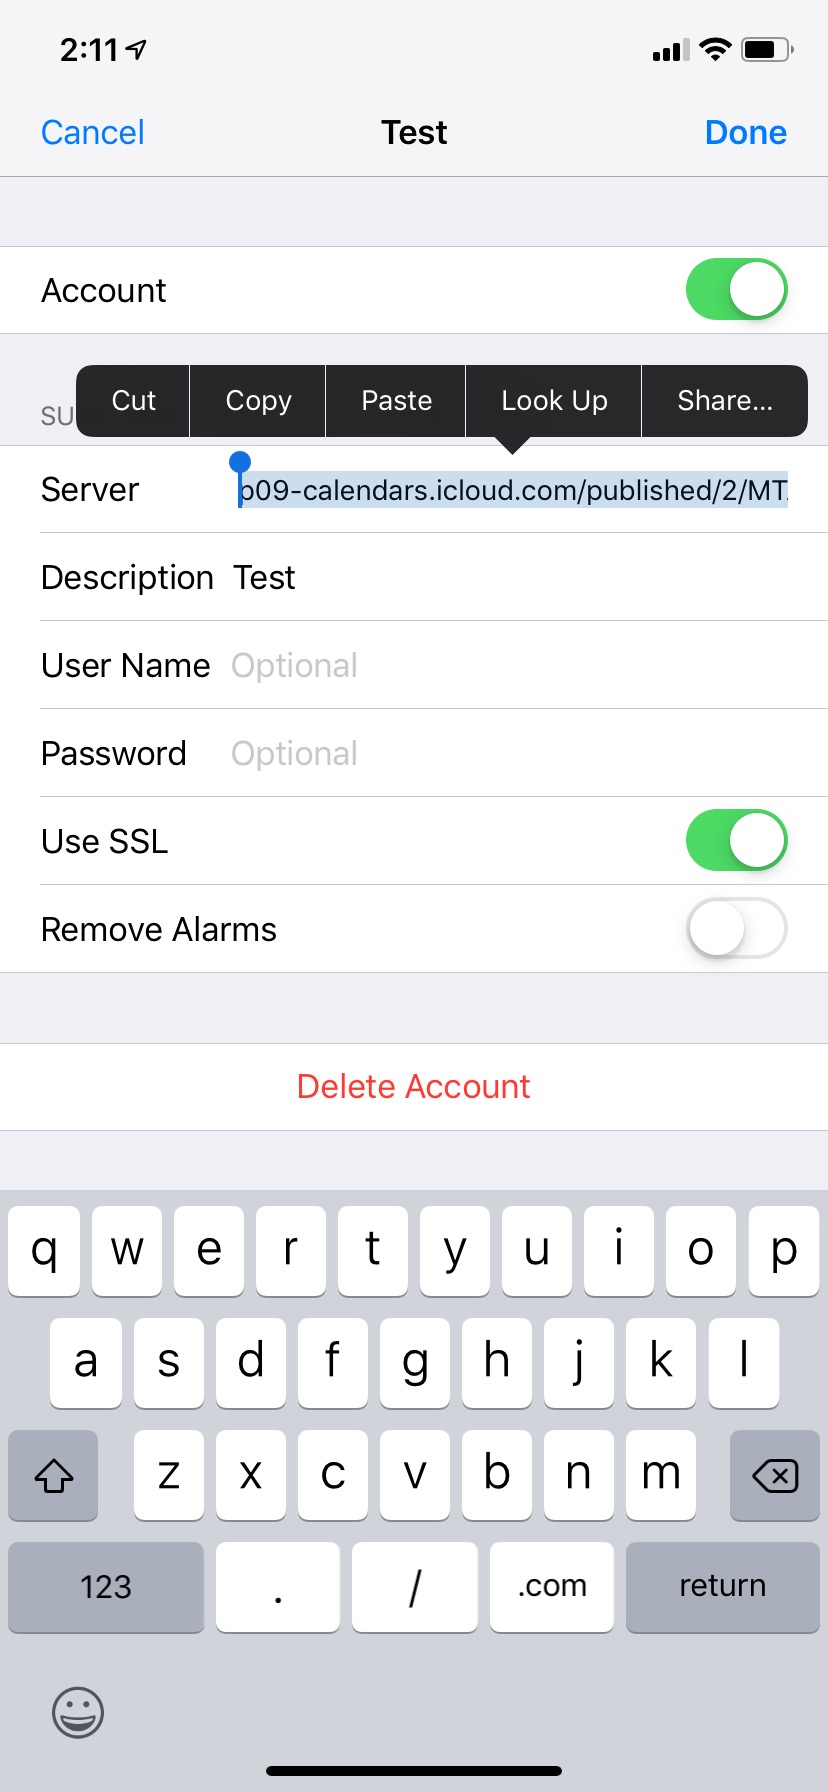
- Tap on the name of the Calendar that you want to sync, and copy the address for Server.
-
After copying the URL, open the Skylight mobile app.
-
Log in and select your Calendar from the list of available devices.
-
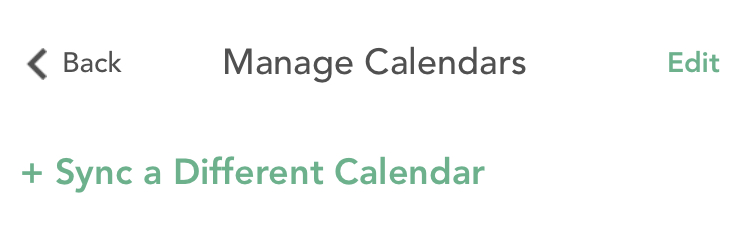
Select the syncing icon from the bottom menu bar:

-
Select + Sync a Different Calendar:
-
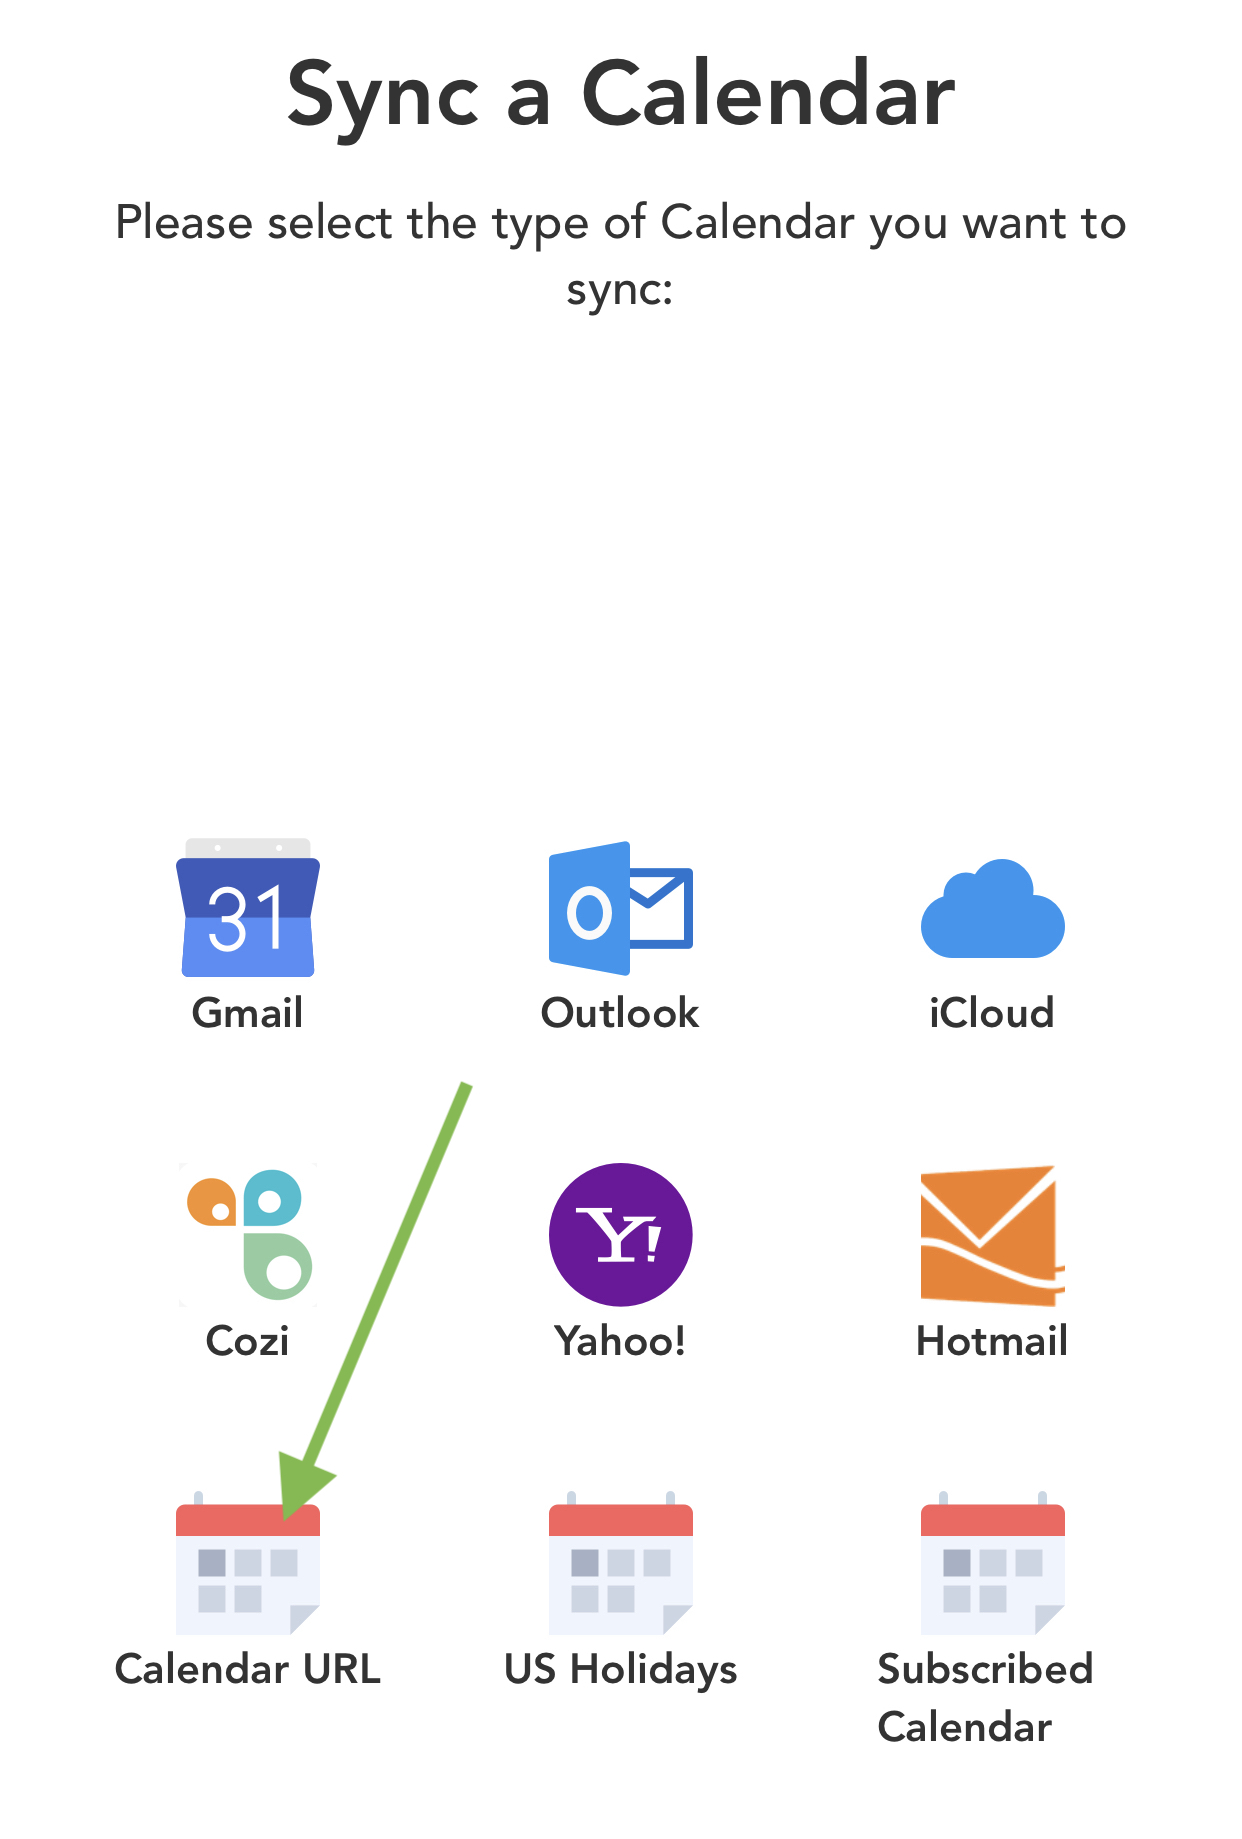
From the list of options select Calendar URL to paste your calendar URL:
-
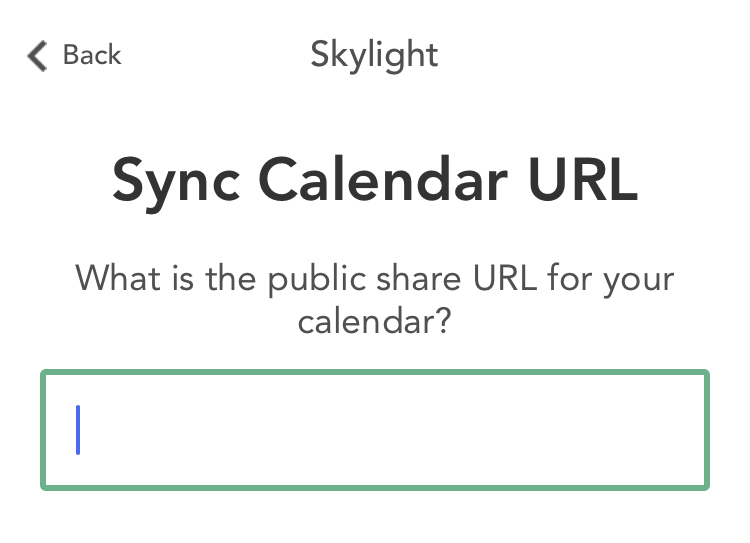
After you select Calendar URL, paste your subscribed calendar webcal URL and tap Sync Calendar URL:
Afterwards confirm you're seeing your events populate on the Skylight Calendar and repeat these steps for any other subscribed calendars!
PLEASE NOTE: If you do not have the option to share your subscribed Apple Calendar, it is possible that the calendar is not merged with your iCloud. To merge your subscribed calendar into your iCloud:
- Search "iCloud" in your calendar settings
- Tap on 'iCloud'
- Select the subscribed calendar
- Tap 'Merge'
You will now have the option to share your subscribed calendar's link with your Skylight Calendar.
Comments
0 comments
Article is closed for comments.